top of page

Anyone else like lemon curd to the point where you find any excuse to put it on something? I do! This recipe is a keeper because it's super versatile. I like the curd sandwiched between cookies, slathered on a slice of pound cake (my fave!), used as a fruit tart filling, or just kept simple as a fresh fruit dip. I've even used it as a filling for a Spring blueberry layered caked. Can't go wrong. My husband's not a big fan of lemon or lemon desserts, and he even loves this in cookie sandwiches.


This recipe was inspired by a couple of "firsts" for me: my first Meyer lemon harvest from my first lemon tree, and the first lavender I ever harvested from my garden. I picked and dried the lavender and stored it away in a glass jar. Then I came up with a dozen ways to use it, including this recipe.


This curd isn't too tart for those who don't like really lemony things (like my husband). And the lavender isn't too strong for those who don't like a lot of floral flavor. Like Goldilocks and the bears, it's just right. And I could eat it straight out of a jar. (Meyer lemons can be on the sweet side, so sometimes I adjust the sugar down to just 1 cup.)


The curd will keep for up to 3 weeks in the fridge. Have fun experimenting! Would love to hear how you use it!


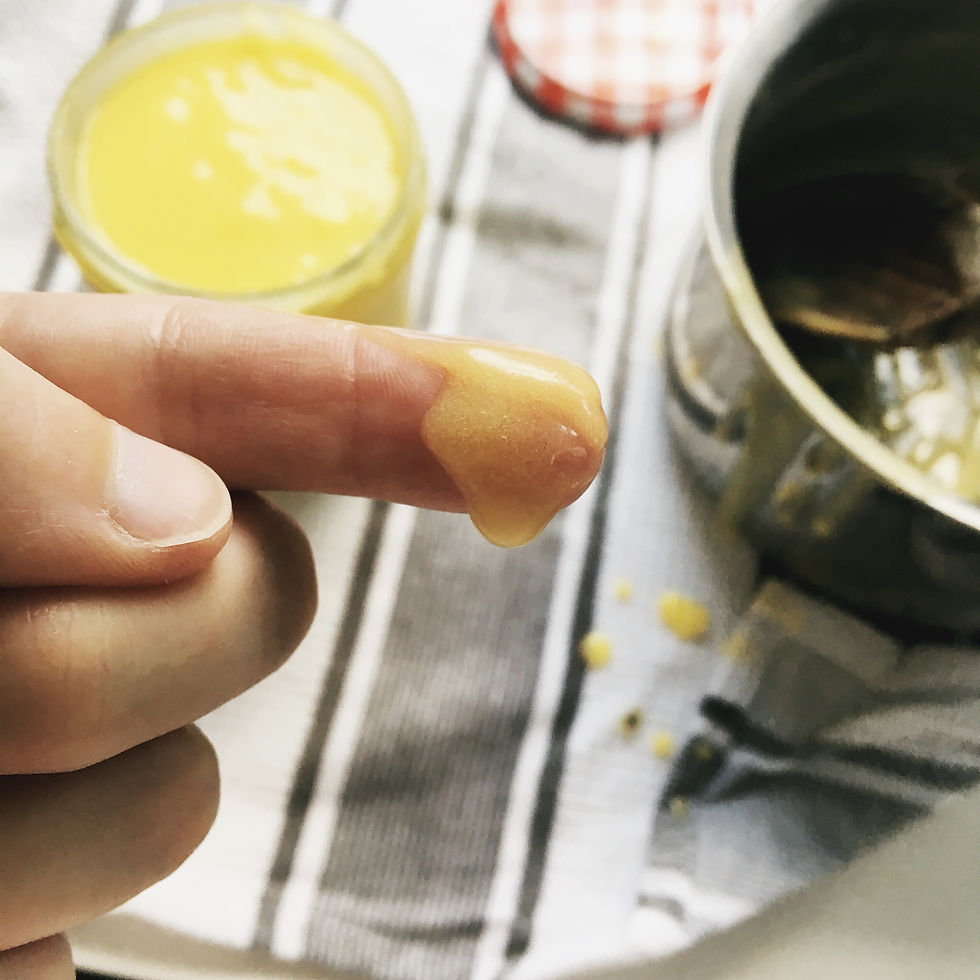
Meyer Lemon Lavender Curd

makes about 3 ball jars


1 1/4 cups sugar

1/4 pound unsalted butter, room temperature

4 large eggs

4 large Meyer lemons, or about 1/2 cup Meyer lemon juice

1 tablespoon lavender

pinch of salt


Cream the butter and sugar with a hand mixer or in a stand mixer until light yellow. Add the eggs and continue beating on low speed. Then mix in the Meyer lemon juice, lavender, and salt. The mixture will look curdled, but don't worry!


Pour the curd mixture into a medium saucepan. Stirring constantly, cook the mixture over medium-low heat until it starts to thicken. This could take 7-15 minutes depending on your stove. It should thicken to the consistency of cream gravy! Remove from the heat quickly once it has thickened. If you're worried about some curdling in the texture, pour the mixture through a sieve into a bowl (or straight into ball jars) to remove any curds. Optionally, sieve out the lavender if you prefer to have the flavor of the lavender but none of the flowers. (This is what I do for my husband.)


Let the curd cool, then refrigerate. I keep mine in Ball jars handy in the fridge. It will thicken more as it cools or gets cold in the fridge.


51 views0 comments

This is my grandmother's recipe for the best, never-let-you-down pumpkin bread. My mom made it a lot for us kids growing up - it's perfect warmed with butter. And my grandmother would even use this same recipe for a pumpkin roll. She'd just bake the batter in a jelly roll pan and roll it into a log with cream cheese icing in the center. This bread warms my bones and my soul, and it's super easy to make.


Meme's Pumpkin Bread

makes 2 9-inch loaves


3 1/2 cups flour

3 cups granulated sugar

2 teaspoons baking soda

2 teaspoons pumpkin pie spice

1/2 teaspoon cinnamon

1 teaspoon kosher salt

4 eggs

2 cups pumpkin puree (1 15 oz. can)

1 cup vegetable oil

1 teaspoon vanilla extract

2/3 cup water

1 cup chopped pecans (optional)


Preheat the oven to 350˚ F.


In a large size bowl, mix together the flour, sugar, baking soda, spices, and salt. In a medium bowl, whisk together the eggs, pumpkin, oil, vanilla, and water. Then combine with the first set of ingredients in the large bowl, stirring just to combine. Fold in the nuts, if using.


Pour the batter into two 9-inch loaf pans or 3 small coffee cans. Fill the pans about half full.


Bake for 1 hour, or until set and lightly brown on top. Let cool in the pans on the counter top.


Slice and serve slightly warm with salted butter. Enjoy!

65 views0 comments

This dish hits me in all the right places. It's so satisfying down to my bones and reminds me of home. Growing up in West Texas meant an annual trip to Hatch, New Mexico. My parents came home with pounds and pounds of green chiles in a car that smelled like roasted chiles for weeks! I want seconds, thirds, and fourths of this dish. I can't make it fast enough for everyone. But I've kept this simple, using Hatch chile sauce, so it can be easily done on a weeknight to meet demand :) .


Easy Chiles Rellenos

Serves 4-6


1 lb. Hatch green chiles (pictured below) or poblano peppers

2 tablespoons olive oil

1 lb. block of mild, aged white cheddar cheese

Toothpicks (optional)

Vegetable oil


Batter:

1 cup self-rising flour

1 tablespoon ground black pepper

1 1/2 teaspoons kosher salt

1 teaspoon garlic salt

1 teaspoon onion salt

1 teaspoon cayenne

1 cup of a light, mildly-flavored beer


Toppings:

28 oz can of Hatch red chile sauce

6 oz cotija cheese, crumbled

1 small bunch of cilantro, chopped

2 limes, sliced

Radishes, sliced (optional)


Preheat the oven to 450º F.


Place the chiles on a rimmed sheet pan lined with aluminum foil. Lightly coat them in olive oil. Roast the chiles in the oven until blistered and turning black in spots, turning them once or twice to blister on all sides. This can take 10-15 minutes. Remove the chiles from the oven and immediately put them in a Ziploc freezer bag, sealed tight, to steam on the countertop for at least 15 minutes.


Carefully open and remove the chiles from the bag. Peel the skin from each chile. It should easily peel off if they steamed long enough. Then, cut a small slit length-wise down each chile, and carefully deseed the chiles without opening them further.


Cut the cheddar cheese into 1/2 inch wide rectangular strips that will fit inside the chiles. Stuff each chile with one or two strips of cheese, depending on the size of the chiles.


If your chiles are too soft, you can poke toothpicks through the middle of the cheese and chile (pictured right) to help hold the chile together while you dip them in the batter. The toothpicks will hold up fine when frying and you can remove them before serving.


Heat the red chile sauce in a small pot over medium-low heat. Let simmer.


Prep your deep fryer or fill your stockpot a quarter full with vegetable oil. Start heating your oil in a stock pot over medium to medium-high heat. (I have a gas stove, so mine gets really hot easily!)


While the oil is heating, make the batter by whisking all the batter ingredients together in a large mixing bowl. The thicker the batter, the breadier the batter will be once fried. I like mine a little on the thinner side for a light, crispy batter. To achieve this, pour in enough beer so that the batter is the consistency of pancake batter and slightly runs off the chiles.


Dip and fry the chiles in batches. Dip a chile in batter being sure to coat it entirely, then quickly put it in the hot oil. This part is messy! I can fry about 4 chiles at a time in my stockpot. Fry each chile until golden brown, turning them once so they fry evenly on all sides. This takes about 5 minutes per chile. Remove each chile from the hot oil with tongs, and set aside on paper towels to drain. Keep going until all chiles are fried. They stay pretty hot for a while!


To serve, place the chiles on a plate. Top with red sauce and sprinkle with cilantro and cotija cheese. Serve with slices of lime and radish.


This will take you straight to West Texas! Enjoy!

37 views0 comments
bottom of page